
Important Information:
- It is highly recommended that a copy of your Recovery Key Phrase is stored securely. RKP is needed when you attempt to bind into a new Google Authenticator.
- To ensure maximum account and asset security, Bybit urges all traders to have their 2FA bound to their Google Authenticator at all times.
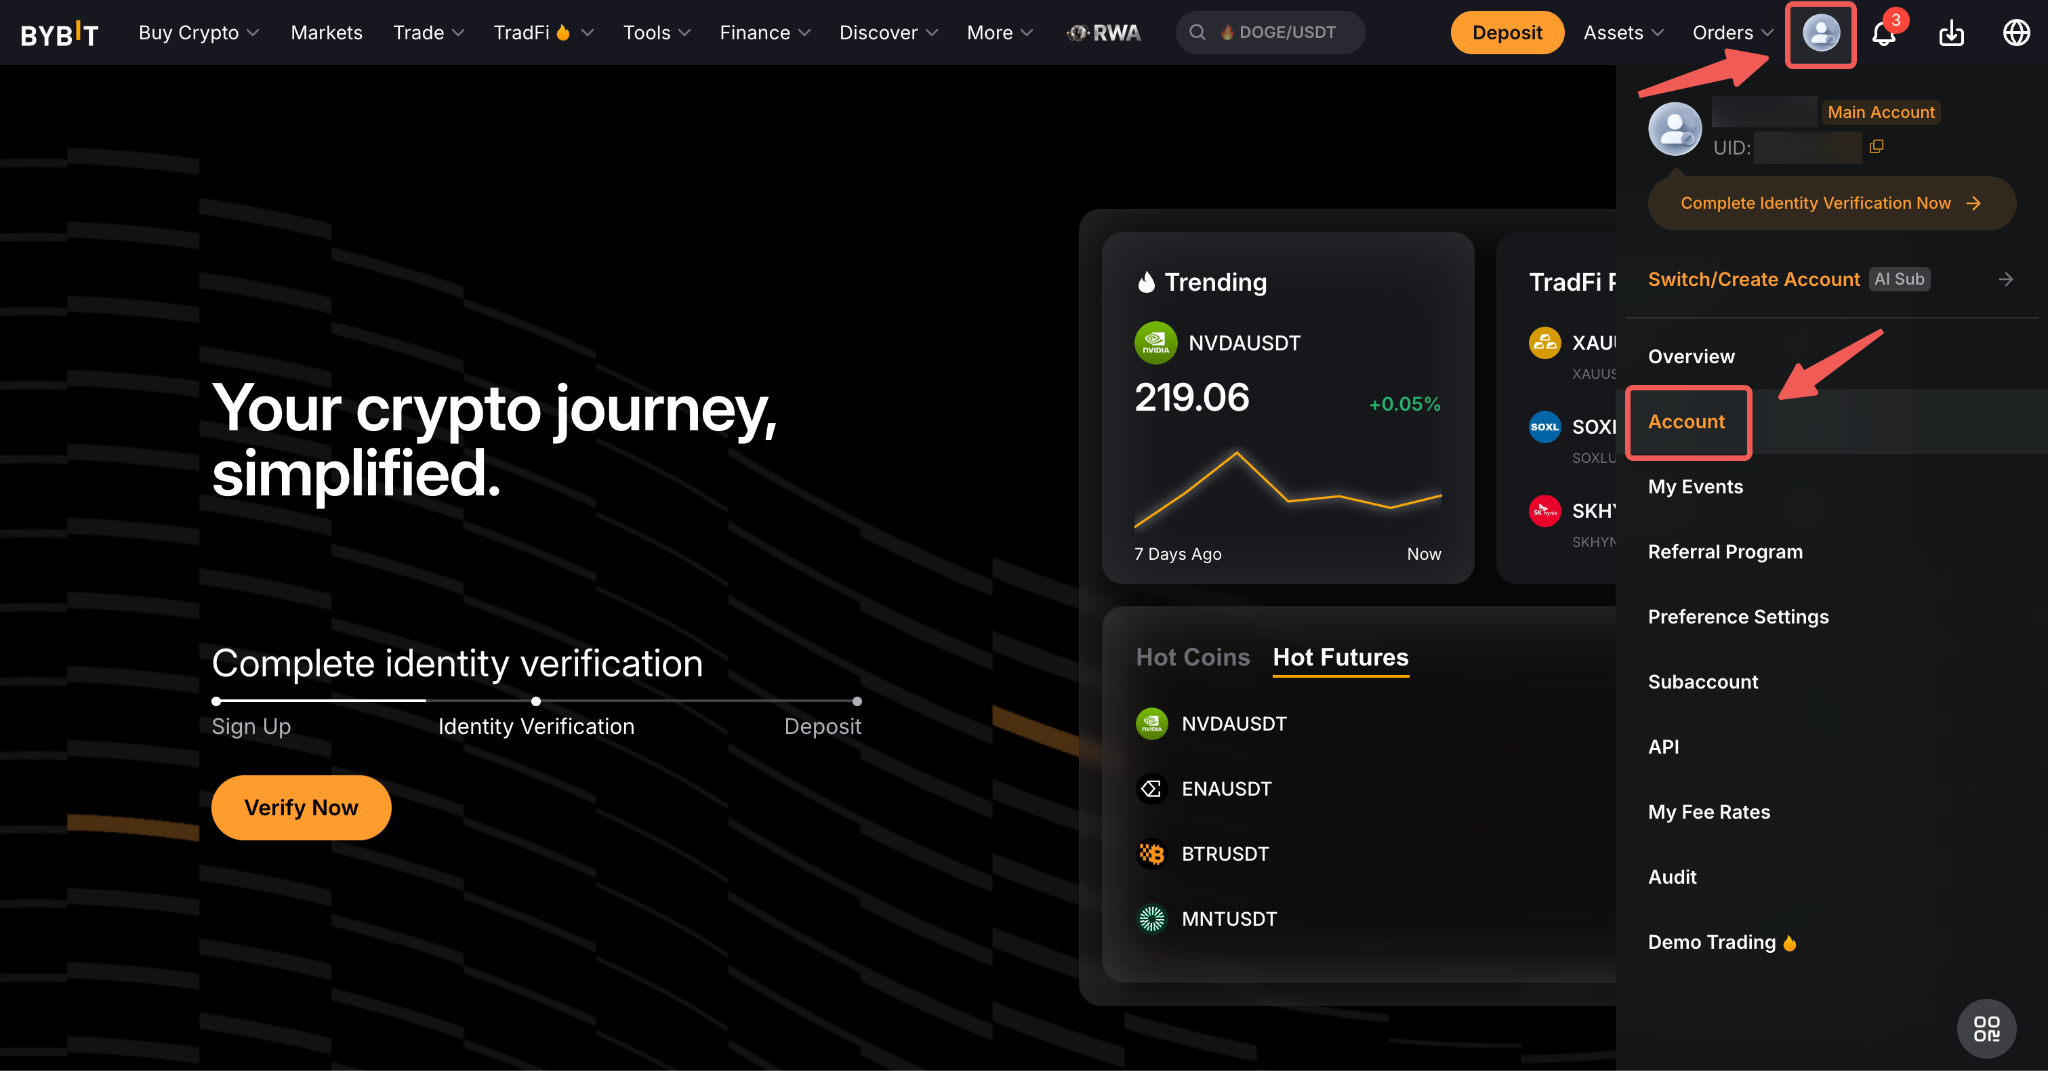
Step 1: To get started, go to the Security page.
Alternatively, hover the cursor over your Profile icon on the Bybit homepage. Then, click Account → Security.
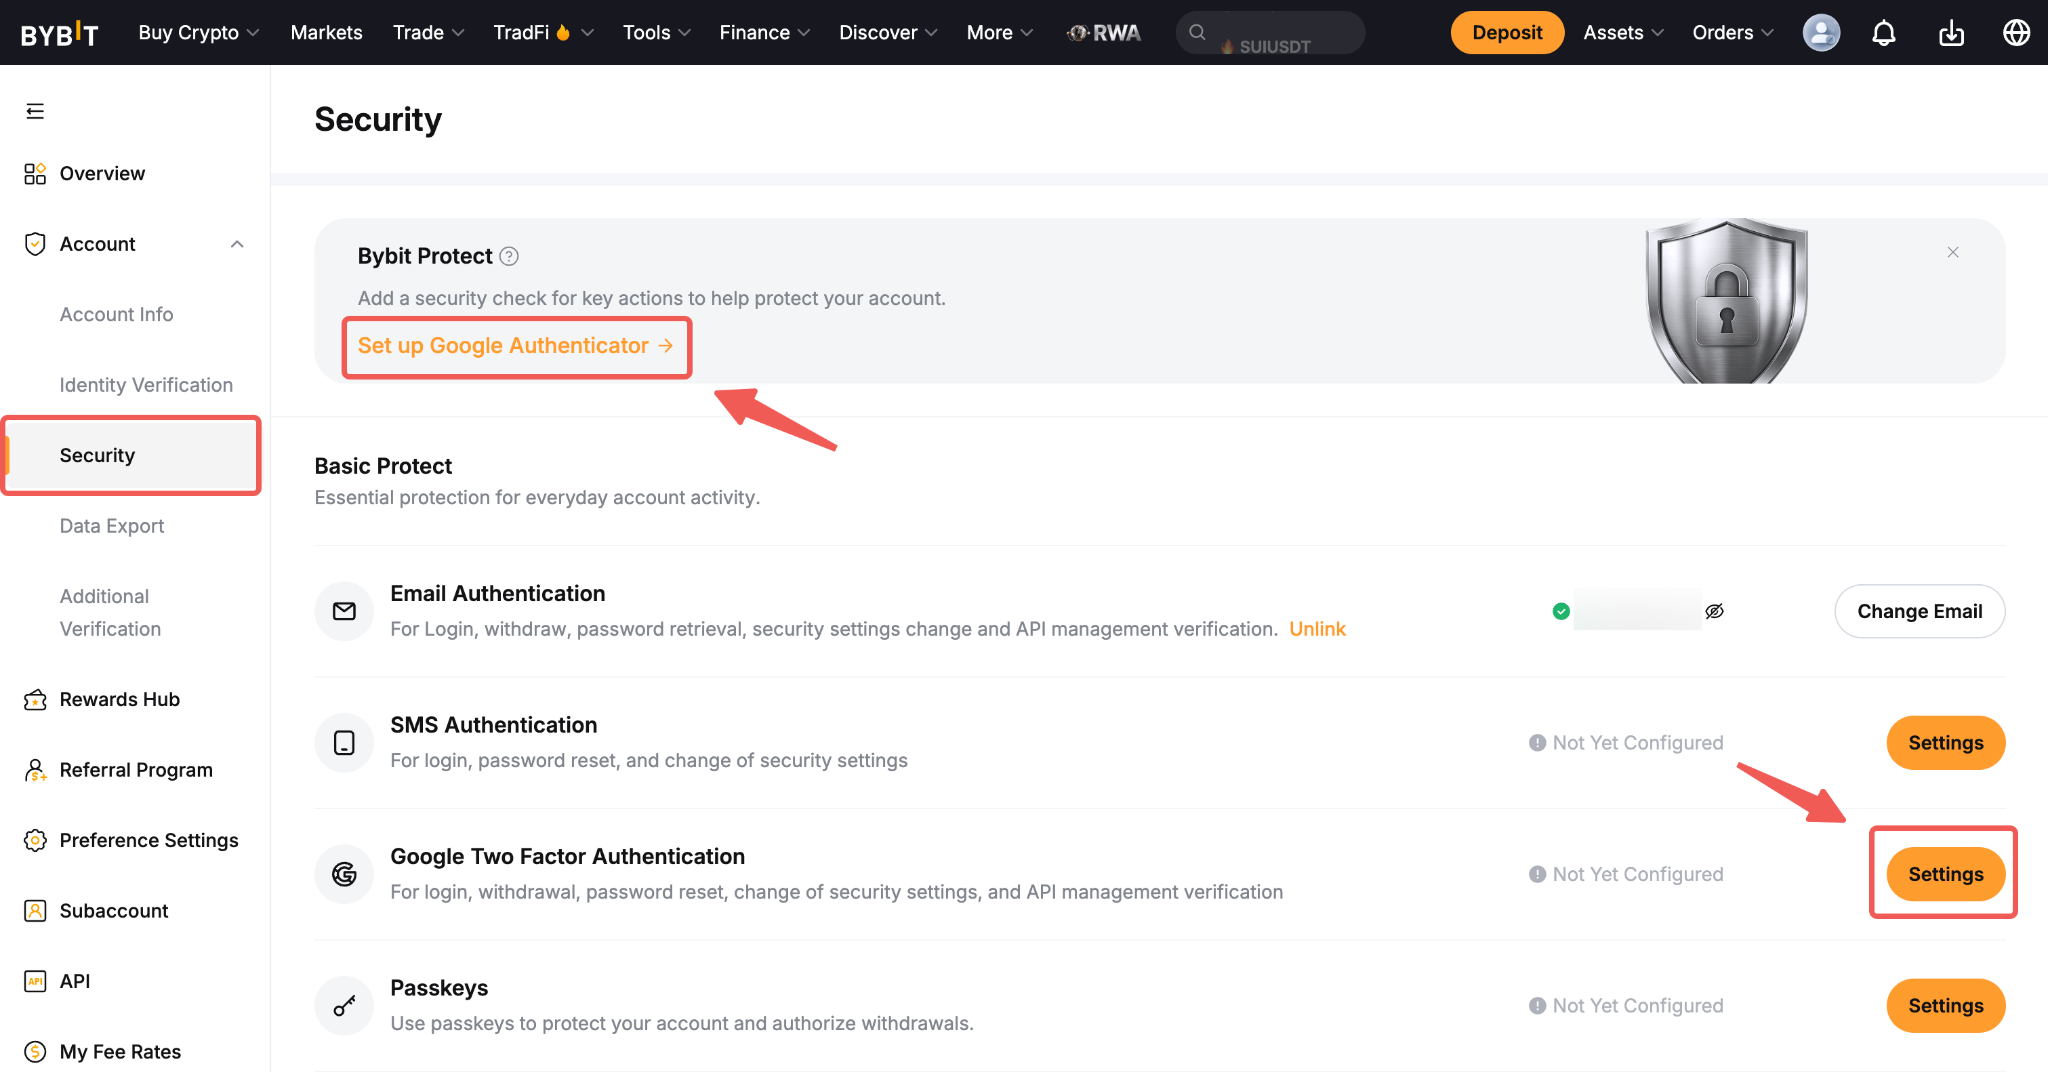
Step 2: Once you’re on the Security page, click the Settings button next to Google Two Factor Authentication. You can also click Set up Google Authenticator via the Bybit Protect banner above to initiate the binding process.
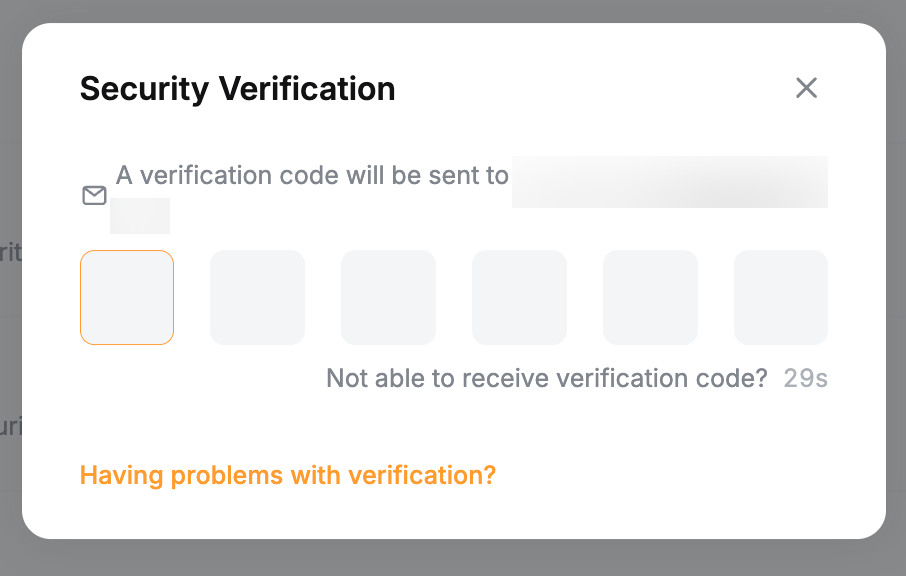
Step 3: A security verification window will appear, and a verification code will be sent to either your registered email address or registered mobile number. Key into the empty boxes, as instructed.
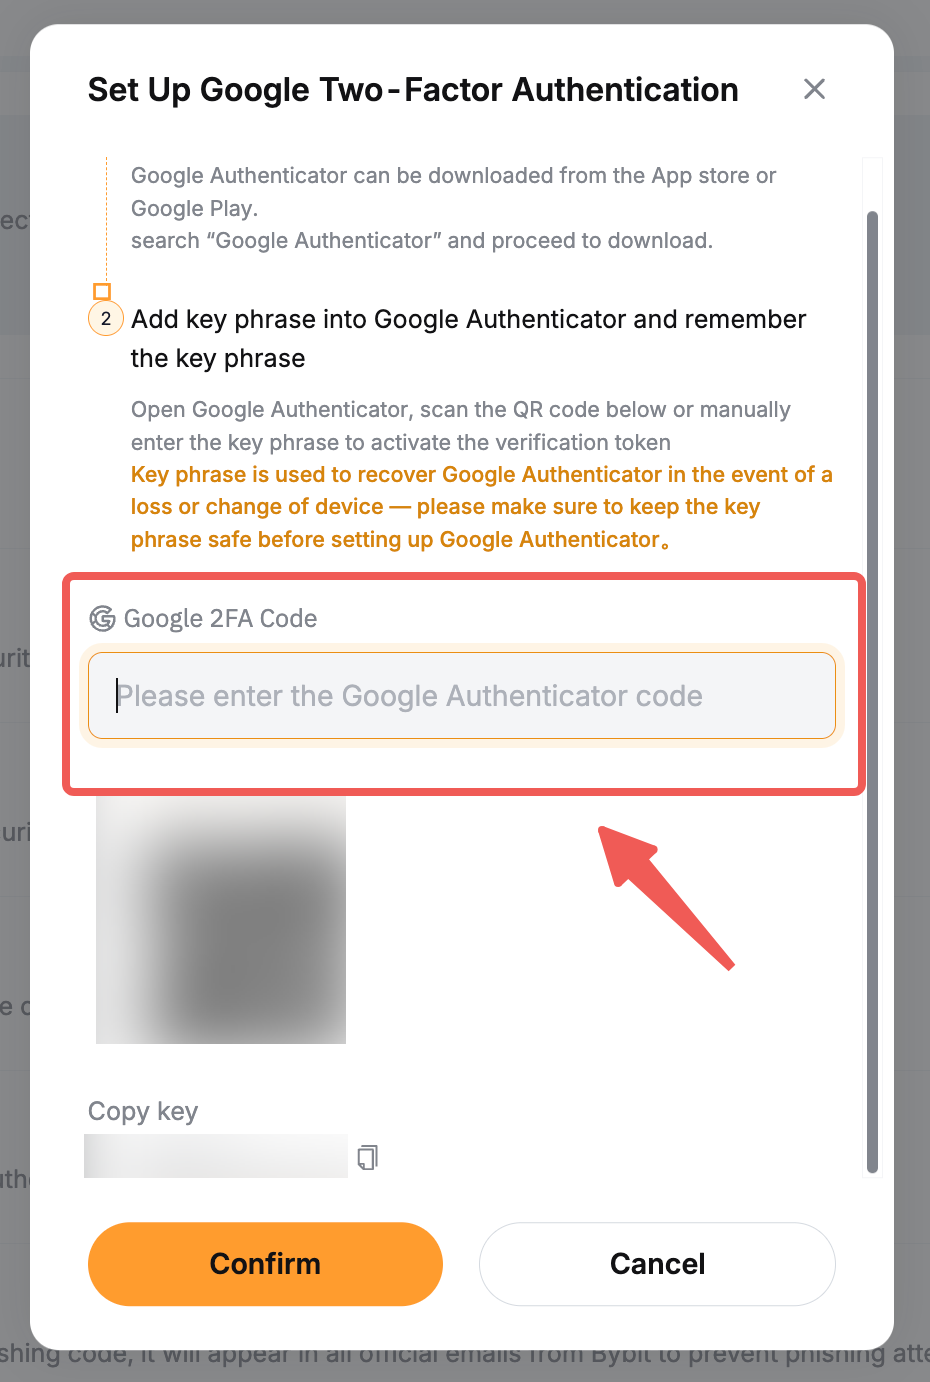
A pop out window showing a QR code will appear. Leave it untouched first while you use your smartphone to download the Google Authenticator App.
Step 4: Download the official Google Authenticator App from Google Play Store or Apple App Store.
Step 5: Launch the Google Authenticator app inside your smartphone or tablet. Select the + icon and select Scan a QR code.
Step 6: Scan the QR code and a 6 digit 2FA code will be randomly generated inside your Google Authenticator APP.
Step 7: Write down the Recovery Key Phrase (RKP). Store your RKP securely inside an encrypted cloud server or inside another secured device.
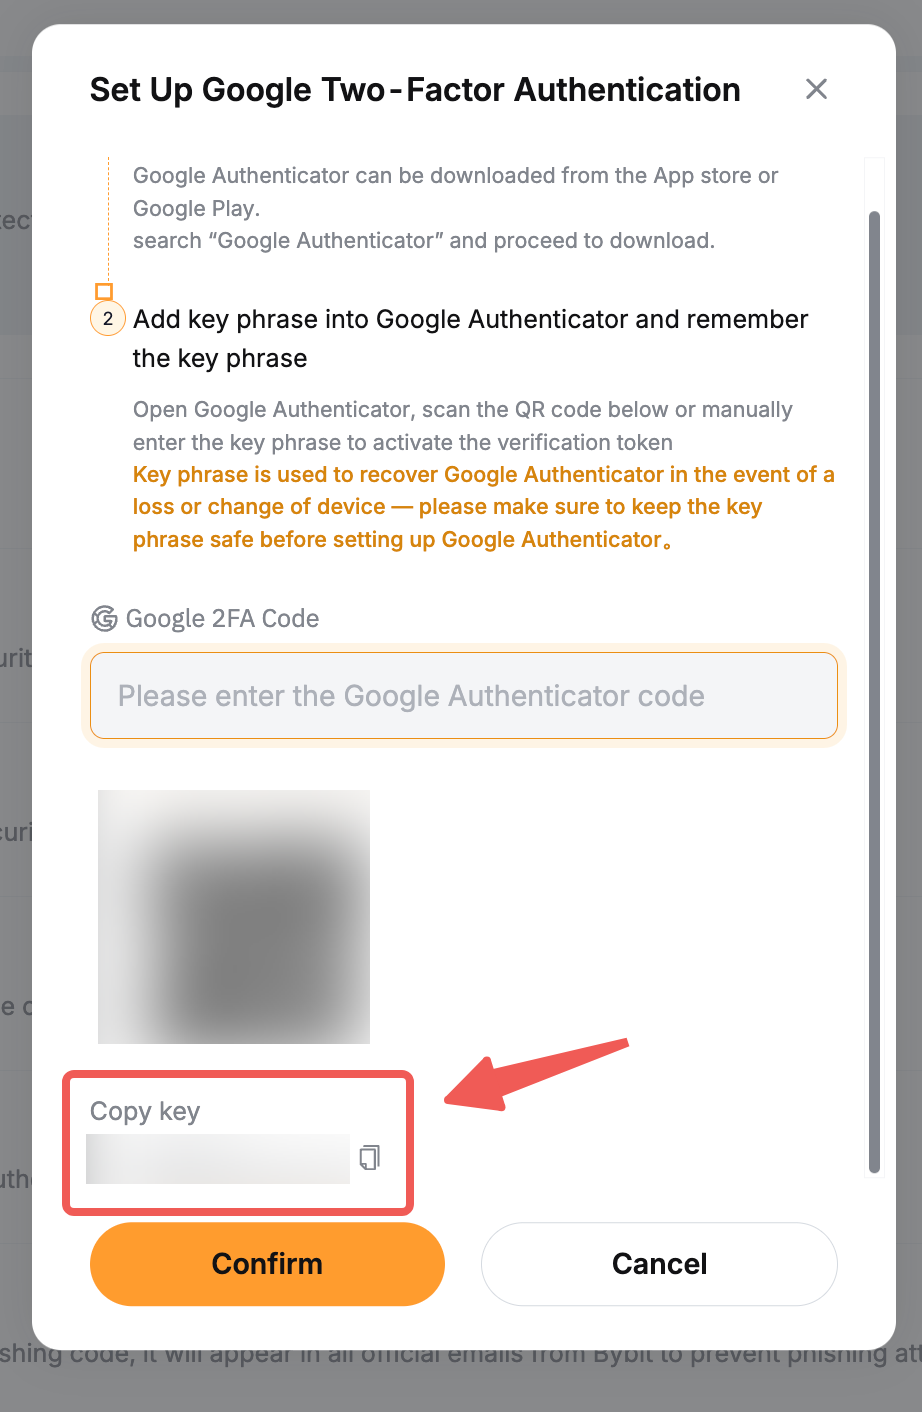
Step 8: Key in the 6 digit code generated in your Google Authenticator and click Confirm.
You have successfully bound your Google Authenticator to your account.