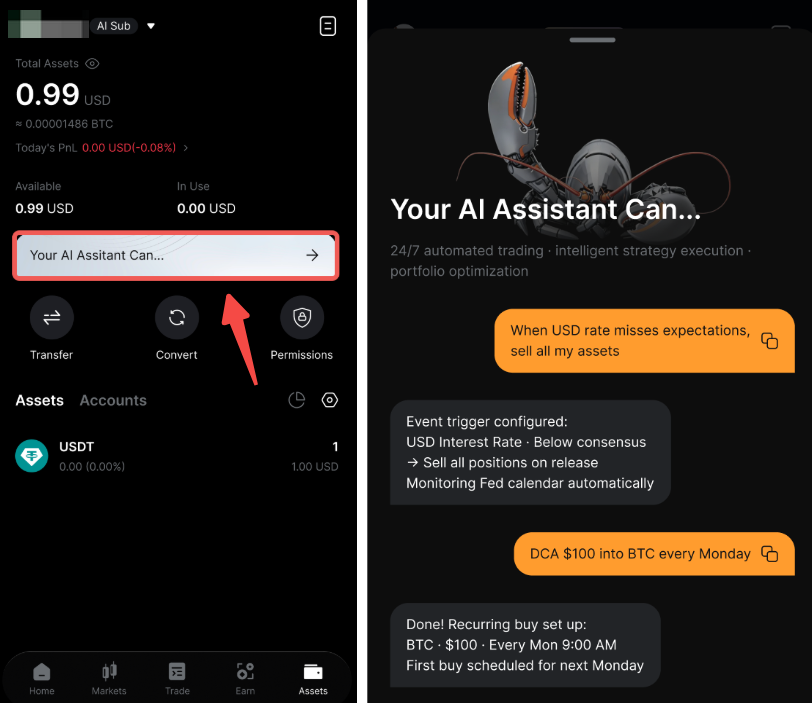
Here’s the step-by-step guide to create and set up the AI Subaccount.
Create an AI Subaccount
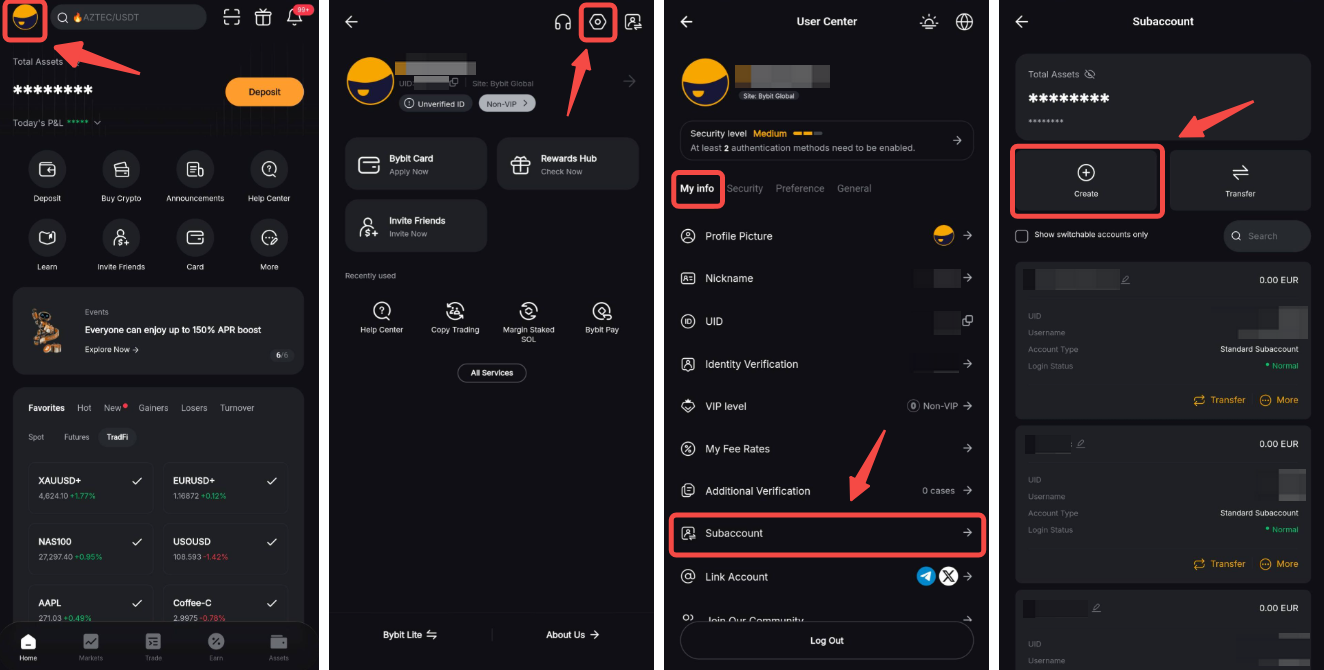
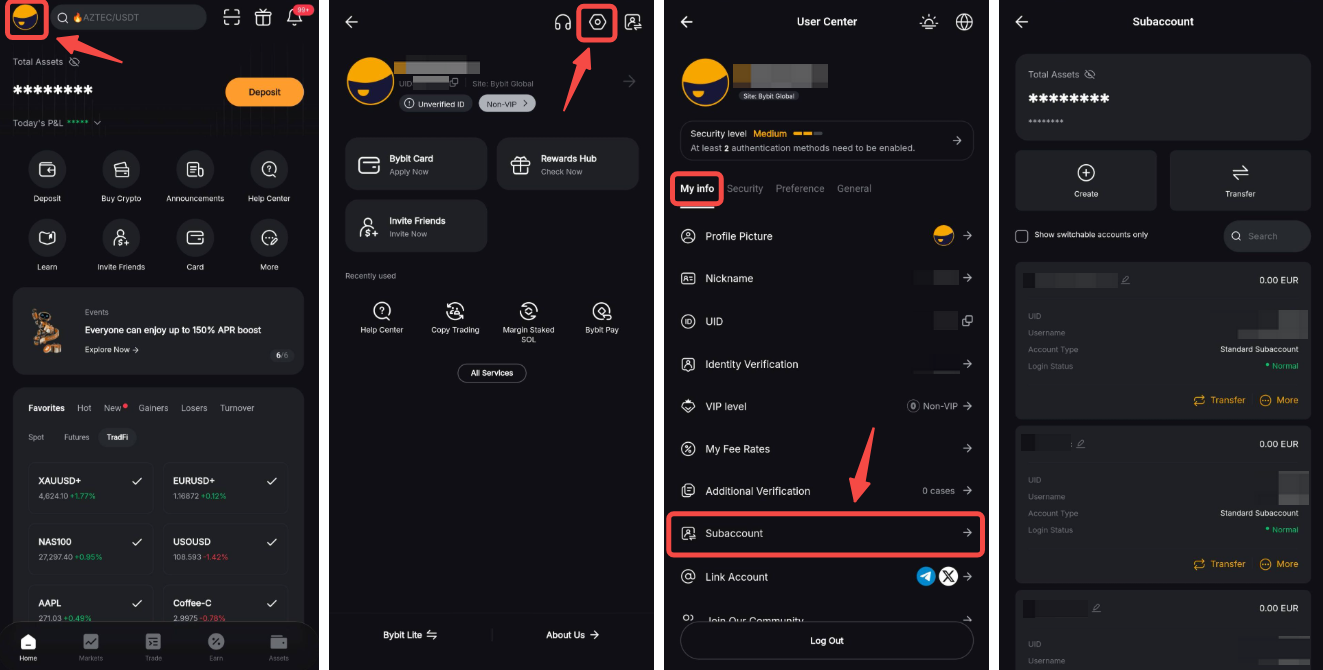
Step 1: On the Bybit App homepage, tap on your Profile icon in the top left corner and go to Settings → Subaccount → Create.
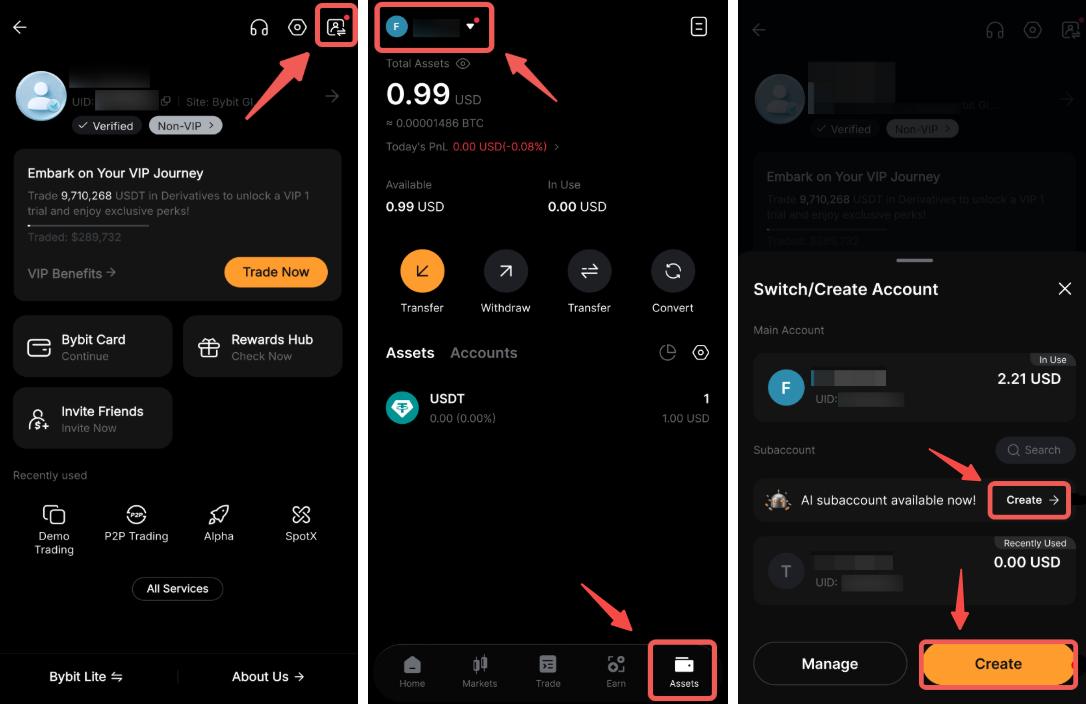
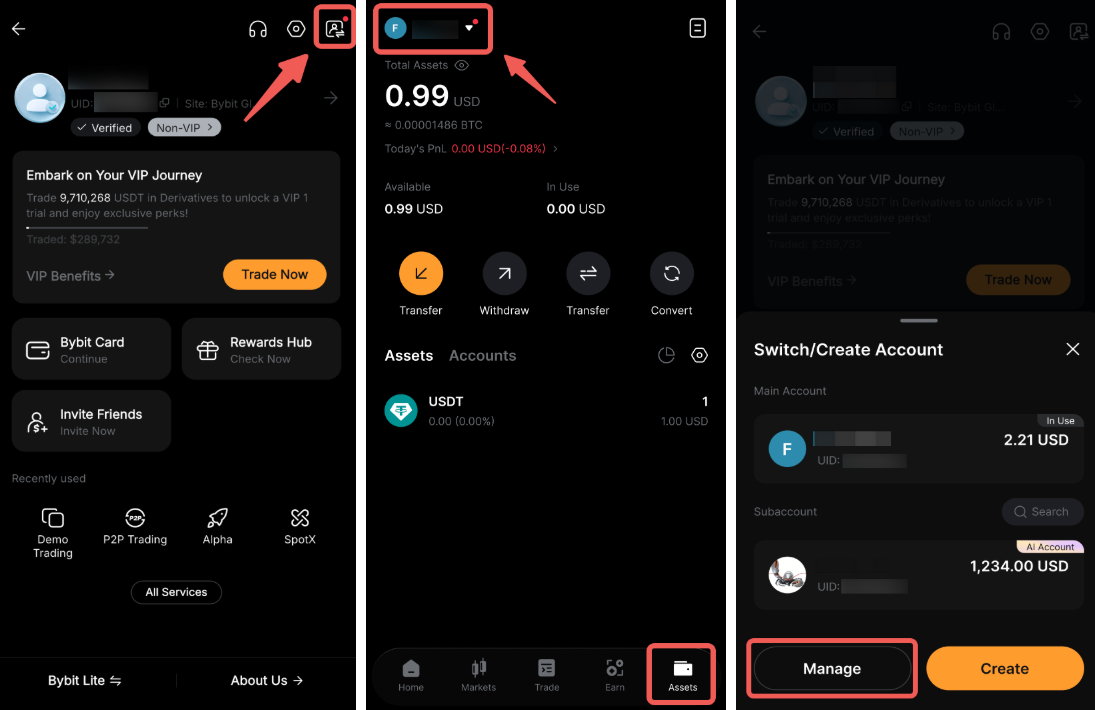
You can also create a subaccount using the Account Switch feature, available on the Account Info and Assets pages. To create an AI subaccount, simply tab on the Create button in the bottom right corner.
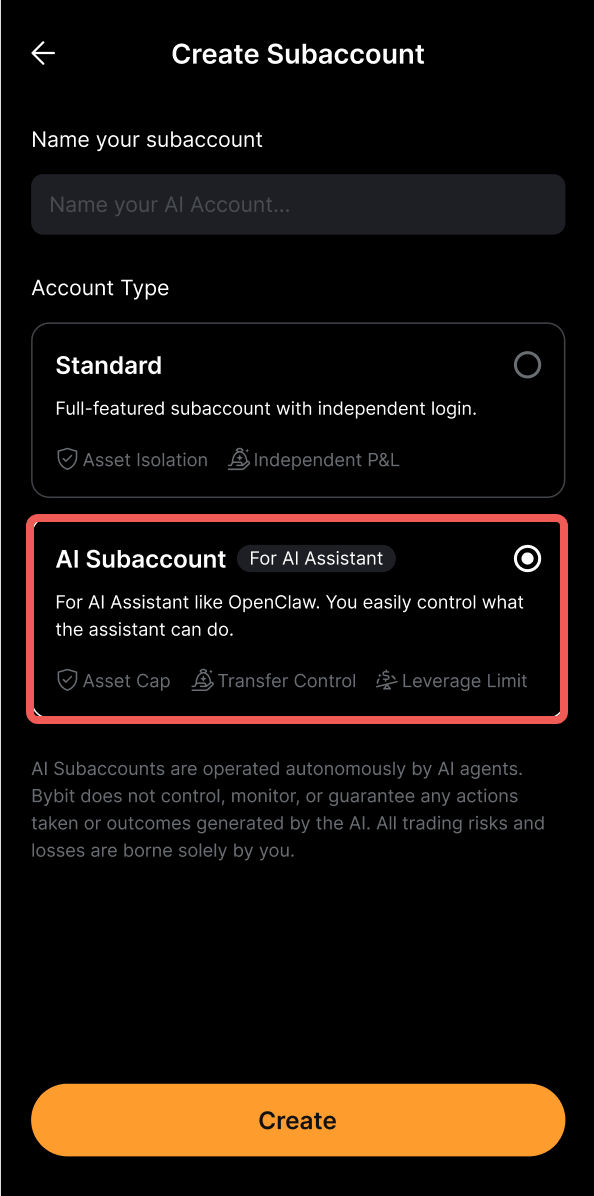
Step 2: Enter the subaccount name and select AI Subaccount, then click on Confirm.
Step 3: Complete the security verification.
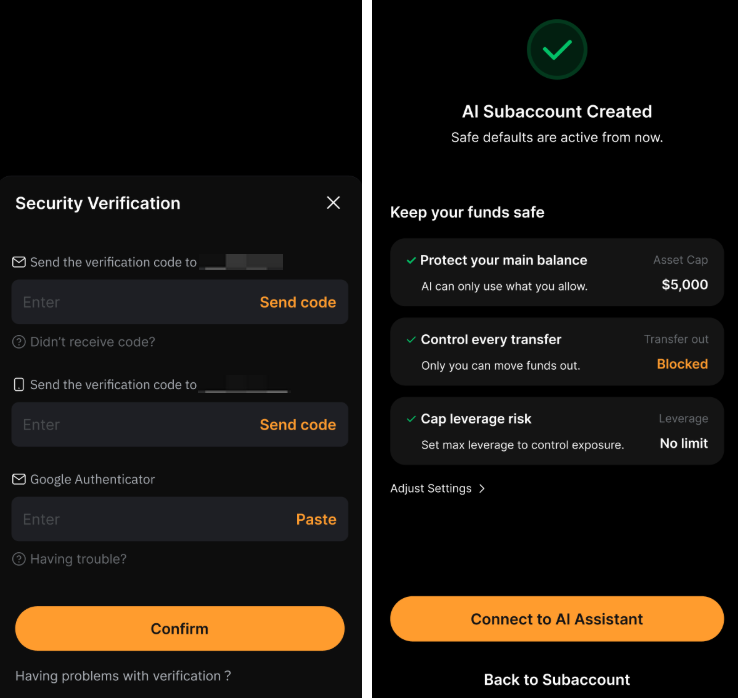
Your AI Subaccount is successfully created!
Set Up Your AI Subaccount
After creating the AI Subaccount, you can connect it to the AI Agent by following the instructions in the pop-up window.
Step 1: Tap on Copy & Connect to copy the command and paste it into your AI Agent.
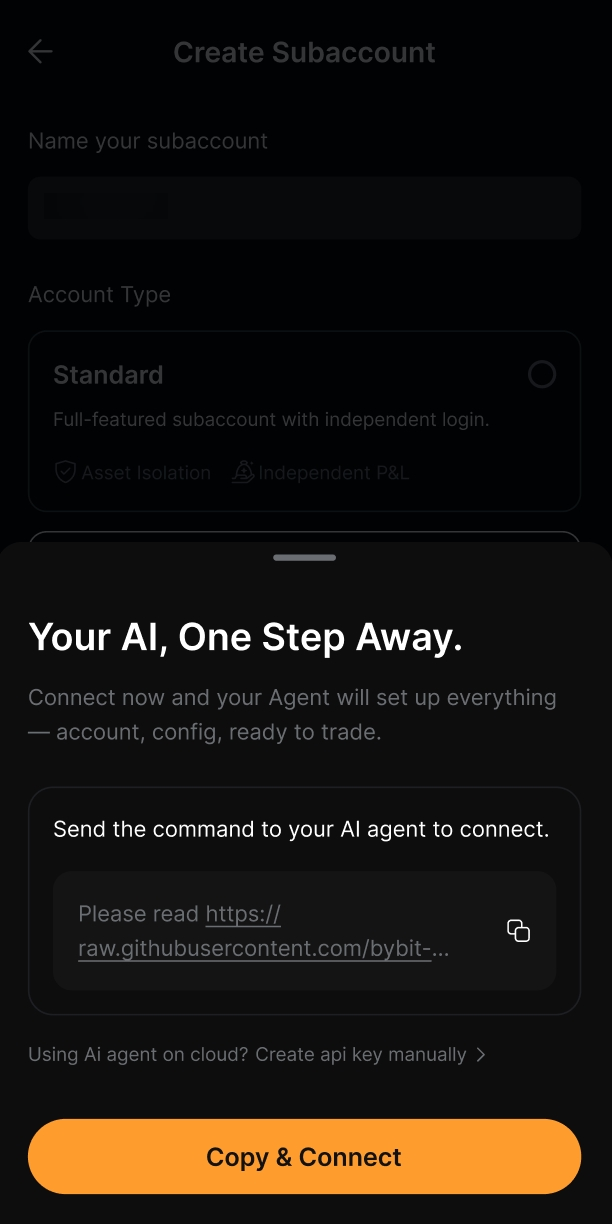
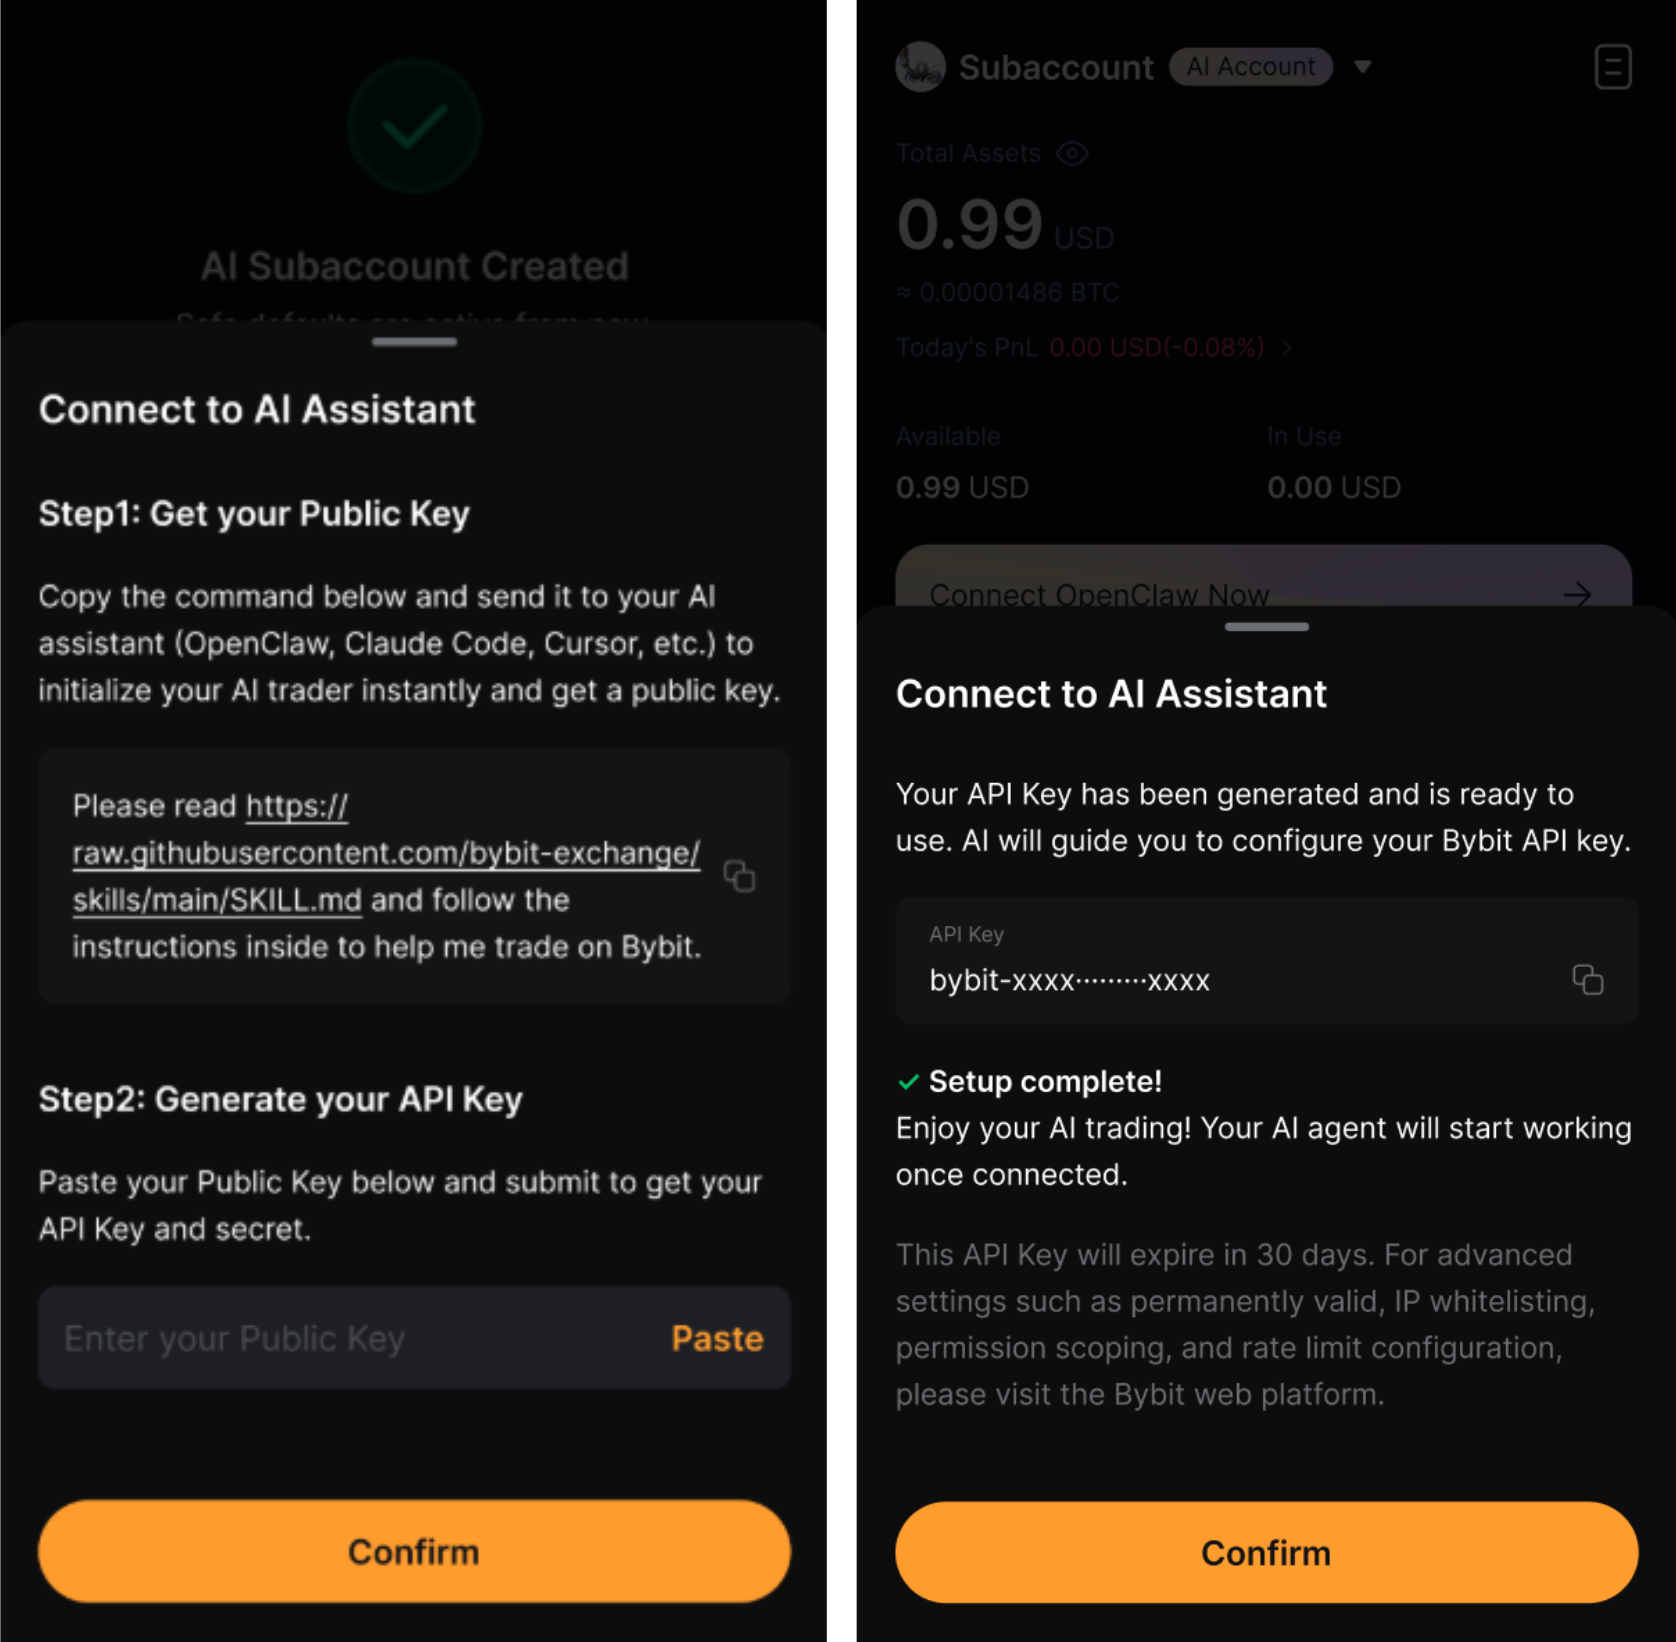
If you use an AI Agent on the cloud, you may create your API key and configure it manually by following the steps below:
- Get your Public Key by copying the command indicated and sending it to your AI Agent, such as Open Claw, Claude Code, Cursor, etc.
- Once done, generate your API Key by pasting the Public Key to retrieve your API Key and secret.
- Your API Key has been generated and is ready to use. Please follow your AI Agent’s guide to configure your Bybit API Key.
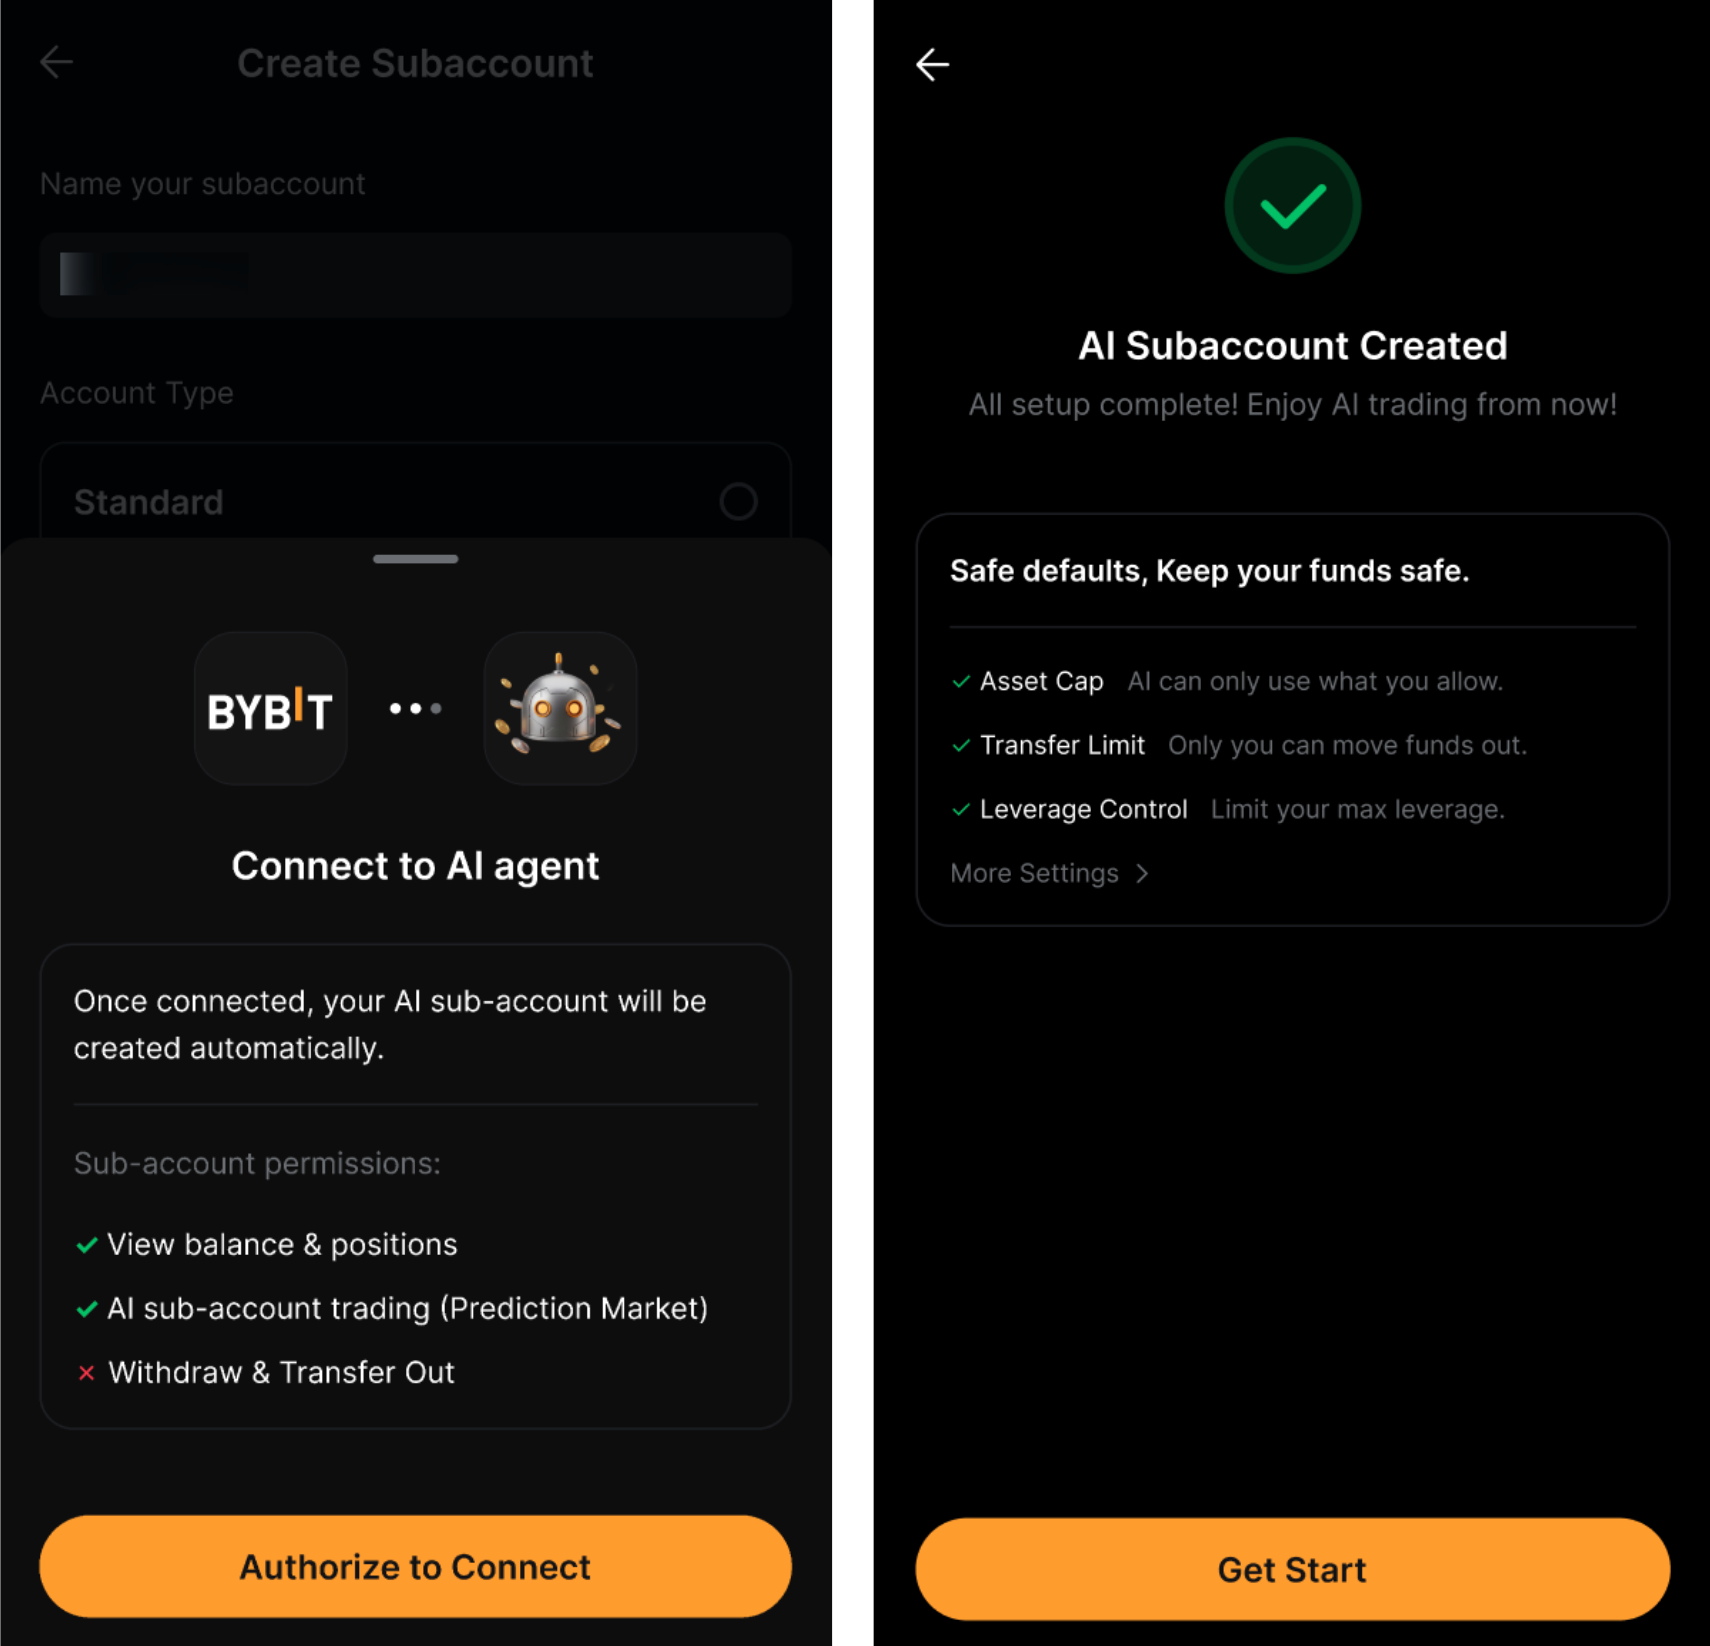
Step 2: Authorize your AI Agent to connect to the Bybit AI Subaccount on the website. Security verification will be required upon authorization. Then tap Authorize to Connect in the App. The setup is complete.
Note: The API Key will expire in 90 days. For advanced settings such as permanently valid, IP whitelisting, permissions scoping and rate limit configuration, please visit the Bybit web platform.
Manage Permissions
After setting up your AI Subaccount, you can manage its permissions. To safeguard your account and API access, please switch to your main account to configure these settings.
Step 1: Once connected to the main account, go to the Subaccount Management page by tapping on your Profile icon in the top left corner and go to Settings → Subaccount.
You can also access the Subaccount Management page using the Account Switch feature, available on the Account Info and Assets pages, and tapping on the Manage button in the bottom left corner.
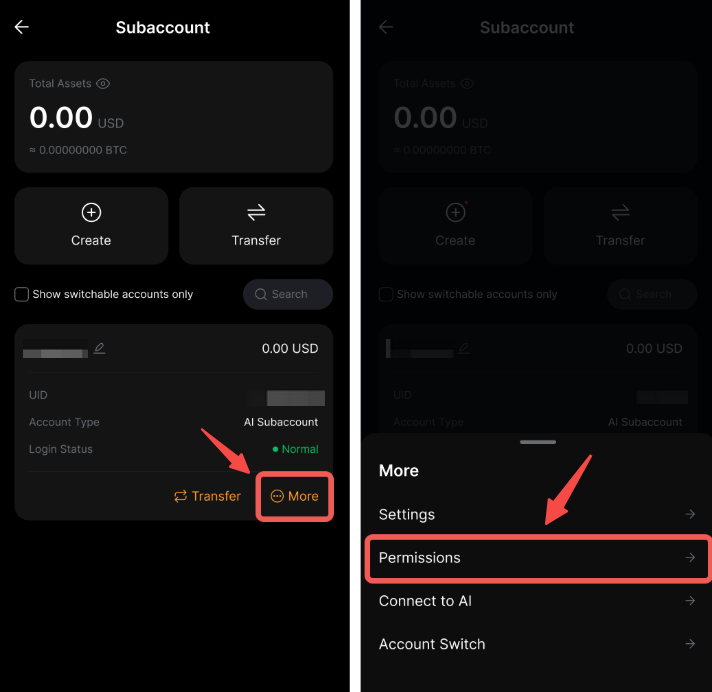
Step 2: Find your AI subaccount and tap on More → Permissions.
Step 3: Manage the permissions for your AI Subaccount.
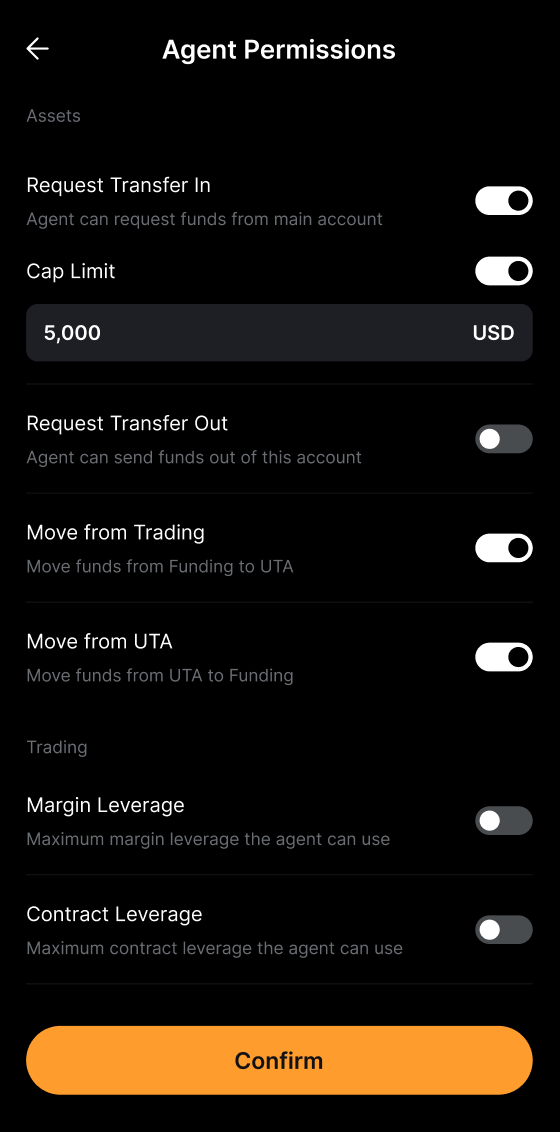
The table below outlines the function of each permission after it is enabled.
Daily Transfer In Limit | Set the maximum USD amount that can be transferred in within 24 hours |
You’re all set! You can now start trading by giving commands to your AI Agent.
Click on “Your AI Agent can…” to view examples of trading commands you can use with your AI Agent.